Tuesday, February 26, 2013

Tasty Tuesday ~ Chocolate Chip Muffin Mix


Welcome to Tasty Tuesday at Dandelion House! Your go to spot for trying something new and healthy each week in your farm kitchen.

Did someone say chocolate?  Lisa Lynn of the Self Sufficient Home Acre did that's who. Mention chocolate and I'll follow you to the ends of the earth to get a taste!  Just look at those mouthwatering muffins...

 Here's what Lisa Lynn says about this delicious homemade muffin mix she keeps on hand year round for quick and healthy HOMEMADE muffins anytime. 
 
Some of the things I like about keeping a big container of this muffin mix in the cupboard are: it’s quick and easy to pop a dozen muffins in the oven, the recipe uses very little sugar, it’s chock full of whole grain fiber, and you can add any dried fruit, baking chips, or flavorings you want to the mix for something new each time. It also makes a very nice gift when you put all the ingredients in a mason jar and top it off with some pretty fabric or paper and a bit of raffia. Add a recipe tag for easy use, and you’ve got a great present for friends or family! ~ Lisa Lynn

 Visit Lisa Lynn for the full recipe! 


Nourish your family with food made with the freshest ingredients and a dash of love every day! 

Dip into The Farmgirl Friday Recipe Box when you're looking for an old fashioned favorite or a home cooked meal made from scratch with love.

* All recipes featured here have been submitted to the ORIGINAL Farmgirl Friday Blog Hop at Deborah Jean's Dandelion House


Sunday, February 24, 2013

New/Old Embroidered Pillow


Howdy friends! I hope you are all doing well on this Sunday afternoon. It's pouring here in New England and I've got the dryer going full blast today trying my best to catch up from a busy week.

 I don't usually post on Sundays, but I'm so excited about how this pillow turned out I couldn't wait until next week to share it!


This pillow was created from three separate vintage pillow cases. They came in a ' lot ' of vintage linens that I bought off of  EBay and were never actually finished with a crochet or lace hem which left them in perfect " UN-used condition ". Someone really spent some time on the embroidery and I just love how each design SCREAMS SPRING!

Add caption
 After cutting the decorated edges off of the pillow cases I sewed them together to form one piece.
Then I added strips of left over pillow case material on either side of the three panels to make a square measuring 21 1/2 inches x 21 1/2 inces.
I used the remainder of one pillow case for the back to complete the pillow.

 I suppose I could have finished the edges and put them to use as pillow cases, but I just loved how the three patterns look together so I made a 20 x 20 pillow to add to my booth space in the Antique Mall.

Maybe you have some embroidered pillow cases tucked away in your linen closet or under the bed someplace that could use a little make over too? Often times the case portion of vintage pillow cases has yellowed due to age or over use but the embroidered edges remain beautiful. It's such a shame to give your vintage linens a life sentence of being packed away.  Why not re- purpose them into pillows, edges for tote bags or add them to NEW pillow cases to be enjoyed for many more years to come?


I hope you're all having a nice easy Sunday afternoon too! 
Now, get to rummaging...And re purpose something lovely!
I've seen you do it! 

See more  of my up cycled vintage linen pillows here and here. 


Friday, February 22, 2013

Farmgirl Friday Blog Hop # 97


 Welcome Friends to week 97 of the Farmgirl Friday Blog Hop!

 Farmgirls love anything to do with homesteading, keeping chicken's, embroidering, sewing, knitting, spinning, quilting, natural home remedies for health care and cleaning, horses, goats, cows, organic gardening and cooking, caring for their loved ones and friends and are community minded. Re-purposing and UP-cycling are high on their list of " fun things to do too! Our resident "FARM-BOYS ' ( Clint the Redeemed Gardner and Rob of Bepa's Garden ) bring wheelbarrow's full of good organic gardening tips to this hop and we are honored to have them join in the fun each week!   
Your Farmgirl Friday Hostesses~  
Heidi of My Simple Country Living 
and White Wolf Summit Farmgirl Blog
Dolly of Hibiscus House and Dolly is Cooking and me of course!

 It's so easy to forget about our skin health while focusing on everyday matters of homemaking and daydreaming about garden plans all winter. Meanwhile our lips are chapped, our skin can begin to look as if the dinosaur age has returned and we start to feel parched from so many hours spent indoors. I think a homemade spa day is just the ticket to replenish and rehydrate our winter skin.

Today I'm featuring three fabulous posts from Rebecca Watkins sure to help you 
get your 
homemade spa day on!

Rebecca shared a recipe for Homemade Lip Balm using all natural products,
 

enlightens us on the 40 INGENIOUS USES uses for salt around the homestead and


 to round out this natural home spa regimen she also shared a fabulous and frugal  
Sounds perfect to me!

Now, it's your turn to link up for your weekly dose of farmgirl soul food!
 Here are the rules for the Farmgirl/guy Blog Hop!

1.) Write a post about your farmgirl lifestyle and brag a little about your farmgirl talents while your at it! Share what being a farmgirl means to you. Include lots of photos of your farm, crafts, animals,  quilts, home decor projects and thrifty make overs, your backyard garden, chicken coop, recipes, studio or workshop. You get the idea!
2). Leave your entry in the  Linky tools space to your  Farmgirl Friday post.
3). Please include the Farmgirl Friday button ( or link back here ) in your post and remember to share this hop with all of your blogging friends!
4.) Enter up to three entries per hop! 

 DON'T BE SHY~  
Be sure to leave a note if you're new to the hop! If you haven't clicked that follow button yet, please join us and be sure to stop by our FACEBOOK page and like us there too! 
As always, thank you for your continued participation and welcome new friends and followers!

Don't forget to grab your FEATURED FARMGIRL BUTTON if you've been featured!


Wednesday, February 20, 2013

Feedsack Pillows


My name is Deborah Jean and I'm a feedsackaholic...There, I said it!
What could be more fun than handling fabric covered in flowers in late winter? I'm starving for all the colors of my yard flowers right about now but the vintage feedsack fabric I've been gathering for making pillows is feeding my appetite for the bold and brilliant colors of a summertime garden at it's  peak! Instead of getting my hands dirty in garden soil I've been humming along with my grandmothers sewing machine making more VINTAGE pillows for my booth at the Antique Mall.

Working with these homespun fabrics also got my detective juices going.
I found a great site with some feedsack history.
Sometime in the 1920's, an enterprising manufacturer of cloth bags hit upon an interesting idea - maybe he could sell more sacks if they were decorated to be more desirable for the farmer's wife. And the era of the printed feedsack began. No longer just beige muslin, with advertising for the feed company, now sacks began to appear in a wide variety of popular colors and prints. And paper labels were applied, like the one pictured above, so that the fabric could be reused without the advertising. Sharons Antiques


Feedsack fabric has been used for making doll clothes, P.J's, dresses, aprons, quilts, hand towels, curtains and more by clever farmwives over the years. I bet today's clever farmwives can come up with many more uses for these beautiful fabrics of yesteryear. It's also highly collectable and desirable to fabric-aholics. I would love any resources you have for these lovely pieces of the past! 

No pattern necessary! 
  • measure and cut your fabric in to a 22 x 22 square.
  • turn fabric inside out and sew three sides together with a 1 inch seem allowance.
  • leave a large enough opening to insert your pillow form.
  • turn fabric right side out and insert pillow.
  • pin opening together and sew it closed by hand or with your machine. 
Up-cycled feedsack fabric makes adorable cafe' curtains, valances, aprons, tote bags, framed artwork and of course pillows! 
This suburban farmwife is having more fun whipping up these beautiful pillows... The feedsack cloth is soft to the touch but sturdy enough for accent pillows on an over stuffed chair, tossed on the bed for a bit of vintage charm or just simply propped up on your favorite side chair in the kitchen to admire and enjoy all day long! I've got a few more on the work table and more feedsack fabric on the way which I'll post soon PLUS a beautiful up cycled pillow created from embroidered pillow case edges.

Here is another wonderful resource for vintage feedsacks.

Here's a peek!


Sharing with Tillys' Nest Down Home Blog hop today!

Tuesday, February 19, 2013

Tasty Tuesday~ Cherry Cheese Pie

Welcome to Tasty Tuesday at Dandelion House! 

I don't know about all of you, but I'm starting to crave more fresh fruit and fresh fruit dishes! This weeks Tasty Tuesday recipe Cherry Cheese Pie comes from the kitchen of Tales of a Kansas Farm Mom . It fits the bill for something light, sweet, fruity and easy. It's no bake!

Growing up the best recipes weren’t found online.  They often looked like this: ~ Kansas Farm Mom


 Nourish your family with food made with the freshest ingredients and a dash of love every day! 

* more delicious farm fresh recipes here.

Love,
Deb 

Friday, February 15, 2013

Farmgirl Friday Blog Hop # 96


Dear friends! Welcome back to the Farmgirl Friday Blog hop! Now it our 96th week and counting down to 100! Woot! Woot!

Your Farmgirl Friday Hostesses~  
 Heidi of My Simple Country Living 
and White Wolf Summit Farmgirl Blog
Dolly of Hibiscus House and Dolly is Cooking and me of course!

Heidi, Dolly and I are looking forward to our giveaways and celebrating with you in just a few short weeks. In the meantime. Would you all be so kind as to give some thought to the questions below and leave us a comment ( or email us ) on any of our blogs with your answers!

Here are some questions to get your farmgirl juices going!  
  • Have you made many new blog friends because of the hop? Have you and your farmstead grown? How so?  
  • Have you added backyard chickens, goats, sheep, pigs or horses to your farm
  •  Have you taken up a new hobby or craft inspired by the hop? 
  • Have you moved to your dream homestead or farm while sharing with us over the last two years on the hop? 
  • What's the most radical thing you've tried in your backyard or homestead?  
  • Have you met any of your Farmgirl/guy Friday blog friends in person?  
  • How has the Farmgirl Friday Blog Hop enriched your life? Or has it?
Thank you in advance for taking the time to share with us! 

Farmgirls love anything to do with homesteading, keeping chicken's, embroidering, sewing, knitting, spinning, quilting, natural home remedies for health care and cleaning, horses, goats, cows, organic gardening and cooking, caring for their loved ones and friends and are community minded. Re-purposing and UP-cycling are high on their list of " fun things to do too! Our resident "FARM-BOYS ' ( Clint the Redeemed Gardner and Rob of Bepa's Garden ) bring wheelbarrow's full of good organic gardening tips to this hop and we are honored to have them join in the fun each week!

Now, it's your turn to link up for your weekly dose of farmgirl soul food!
 Here are the rules for the Farmgirl/guy Blog Hop!

1.) Write a post about your farmgirl lifestyle and brag a little about your farmgirl talents while your at it! Share what being a farmgirl means to you. Include lots of photos of your farm, crafts, animals,  quilts, home decor projects and thrifty make overs, your backyard garden, chicken coop, recipes, studio or workshop. You get the idea!
2). Leave your entry in the  Linky tools space to your  Farmgirl Friday post.
3). Please include the Farmgirl Friday button ( or link back here ) in your post and remember to share this hop with all of your blogging friends!
4.) Enter up to three entries per hop! 

 DON'T BE SHY~  
Be sure to leave a note if you're new to the hop! If you haven't clicked that follow button yet, please join us and be sure to stop by our FACEBOOK page and like us there too! 
As always, thank you for your continued participation and welcome new friends and followers!

Don't forget to grab your FEATURED FARMGIRL BUTTON if you've been featured!


Yours in Farmgirl Spirit,
Deb, Heidi and Dolly

 This weeks BEACH FARMGIRL POST here.
A Little Romance Everyday

Thursday, February 14, 2013

ROMANTIC UPcycled Container Garden


Happy Valentines Day friends!
Today I'm digging into the Dandelion House archives ( circa 2010 ) to share an easy upcycled container garden project with you sure to bring a little 'everyday romance' into your life and your garden! It's one of my favorites and so easy to make!

 I hope you all have a sweet, sweet day with those you love.
All I need is chocolate and kisses :)


Wednesday, February 13, 2013

VINTAGE Tablecloth Pillow Tutorial


Dear friends,
 If you've been with me for a while you already know that I've been on the hunt of late to fill up my booth space at the Antique Mall in my home town. I've been gathering in vintage tablecloths, feed sacks, flour sacks and grain sacks to have on hand for making pillows. I'm especially drawn to anything with bold, colorful FLOWER ( you know me and flowers ) prints. Lucky for me, this seems to have been  ' the thing" back in the day! Today I'm sharing a simple pillow project that I whipped up using a piece of vintage table cloth fabric. If this pattern doesn't put a skip in your deep winter step I don't know what would other than maybe a trip to the Bahama's.


Don't rule out a table cloth if it has minor light staining on it. It's possible to remove some stains with a heavy duty cleaner such as  Lestoil ( my hubby told me about it) but if your tablecloth is large enough you can use it as a cutter for crafts or home decor items which is what I did with this one. I already had a 20 x 20 down filled pillow form on hand which I purchased at Ikea for 7.00 each. It's a quality pillow form and makes my old/new pillow look and feel like a luxurious modern day item with homespun appeal.


No pattern necessary! 
  • measure and cut your fabric in to a 22 x 22 square.
  • turn fabric inside out and sew three sides together with a 1 inch seem allowance.
  • leave a large enough opening to insert your pillow form.
  • turn fabric right side out and insert pillow.
  • pin opening together and sew it closed by hand or with your machine. 
Up-cycled vintage tablecloths make adorable cafe' curtains, valances, aprons, tote bags even framed artwork! 

And, if you are lucky to find some that are in " mint " condition they make wonderful wedding gifts for your retro loving friends! 

Do you collect vintage linens? Do you UPCYCLE them ? I'd love to hear what YOU make...!


Tuesday, February 12, 2013

Tasty Tuesday~ Potato Hash with an EGG on Top

            Welcome to Tasty Tuesday at Dandelion House! 
 With each passing day we have more daylight and you know what that means for backyard chicken keepers. Farm Fresh eggs are returning to the nesting boxes! For those of us who let our hens ' rest ' during the winter months it's so exciting to find the first egg of the coming season. The Cottage Hens are back in production here at Dandelion House and I'm on the look out for new recipes to use up those delicious eggs.

This weeks Tasty Tuesday recipe comes from  Joan, The Chicken Mama . She shared her recipe for spicy potato hash with an EGG on top on the Farmgirl Friday blog hop last week. 

  Everything's better with an Egg on top. ~ The Chicken Mama 


I couldn't agree more Joan! Thank you for sharing this recipe and happy cooking! 

 Nourish your family with food made with the freshest ingredients and a dash of love every day! 

* more delicious farm fresh recipes here.


Friday, February 8, 2013

Farmgirl Friday Blog Hop # 95


 Welcome to the Farmgirl Friday Blog Hop # 95.
Can you believe we are only 5 hops away from our 100th Anniversary?
I have to tease you just a bit... Heidi, Dolly and I have some amazing giveaways planned and a few other surprises too so be sure to stay tuned and continue to enter your posts every Friday! Be sure to stop by both Heidi and Dolly's' blogs to see who else is featured. It just might be you!

Your Farmgirl Friday Hostesses~ 
Heidi of My Simple Country Living 
and White Wolf Summit Farmgirl Blog
Dolly of Hibiscus House and Dolly is Cooking and me of course!

  Farmgirls love anything to do with homesteading, keeping chicken's, embroidering, sewing, knitting, spinning, quilting, natural home remedies for health care and cleaning, horses, goats, cows, organic gardening and cooking, caring for their loved ones and friends and are community minded. Re-purposing and UP-cycling are high on their list of " fun things to do too! Our resident "FARM-BOYS ' ( Clint the Redeemed Gardner and Rob of Bepa's Garden ) bring wheelbarrow's full of good organic gardening tips to this hop and we are honored to have them join in the fun each week!

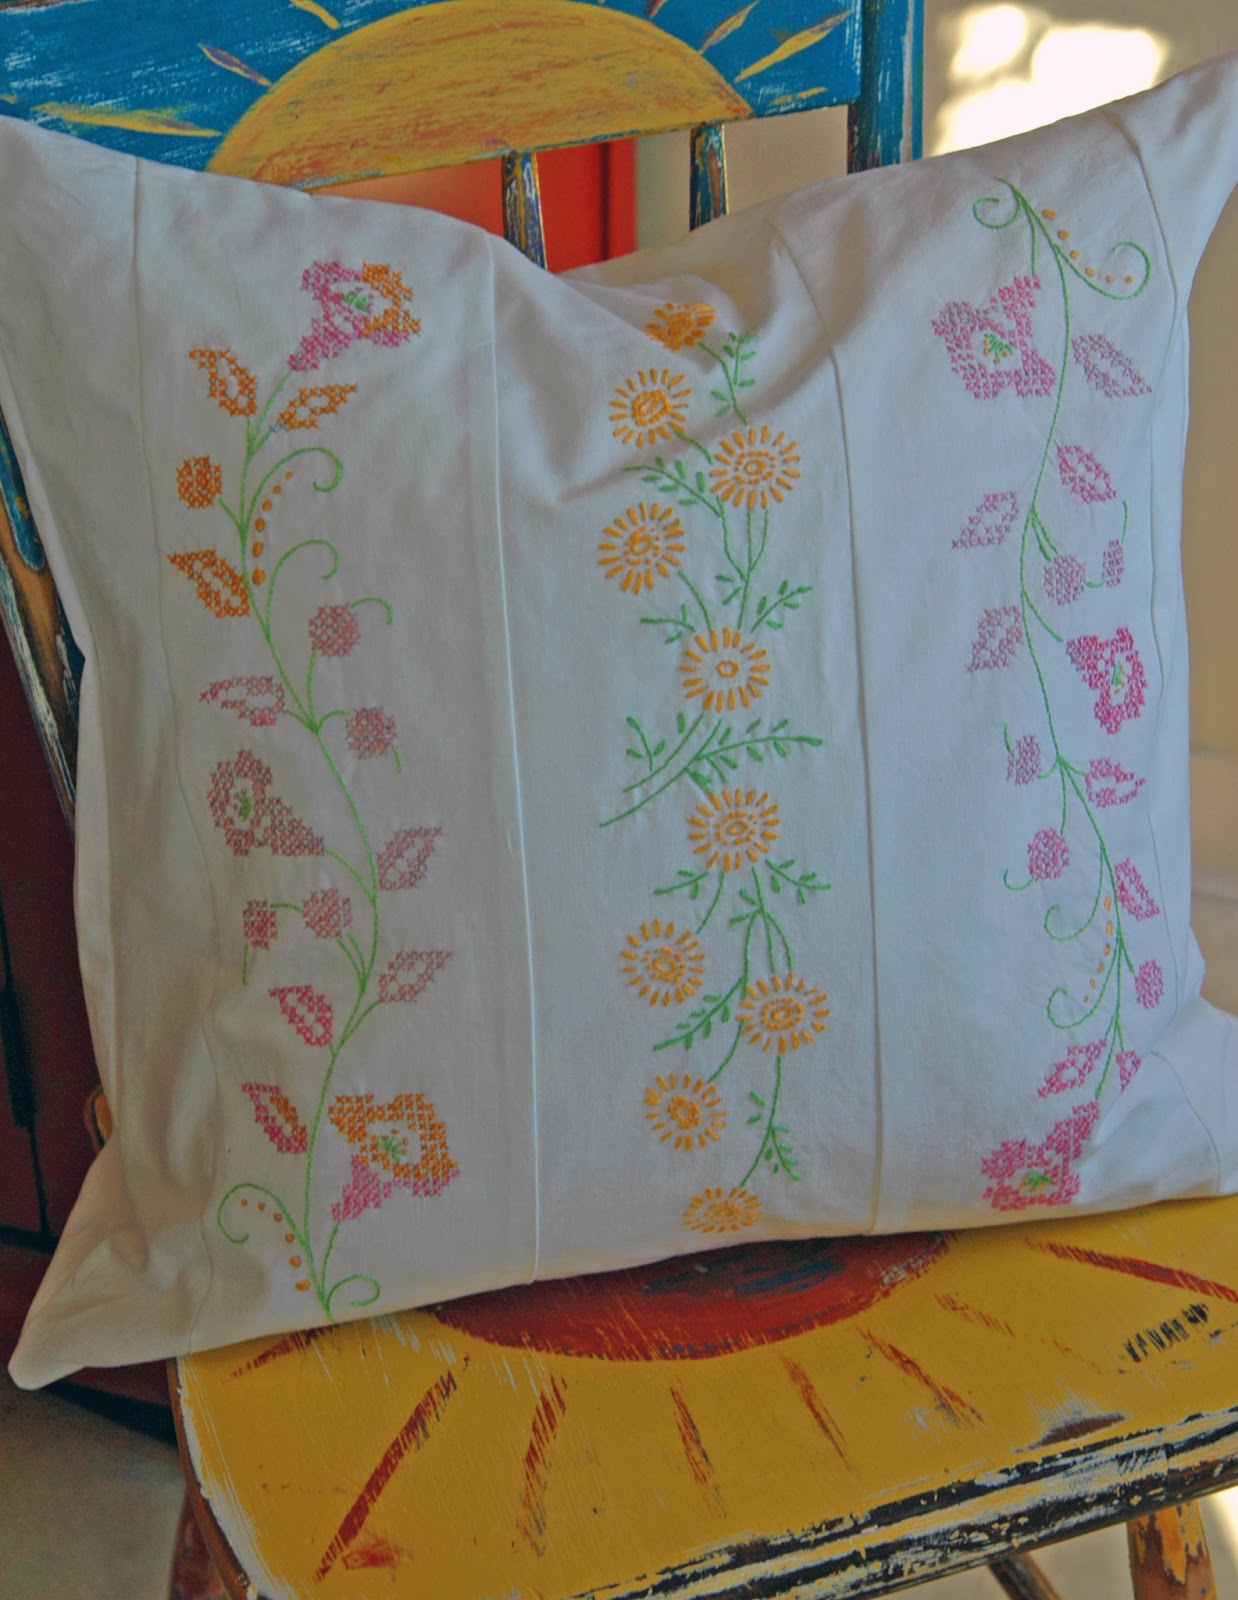
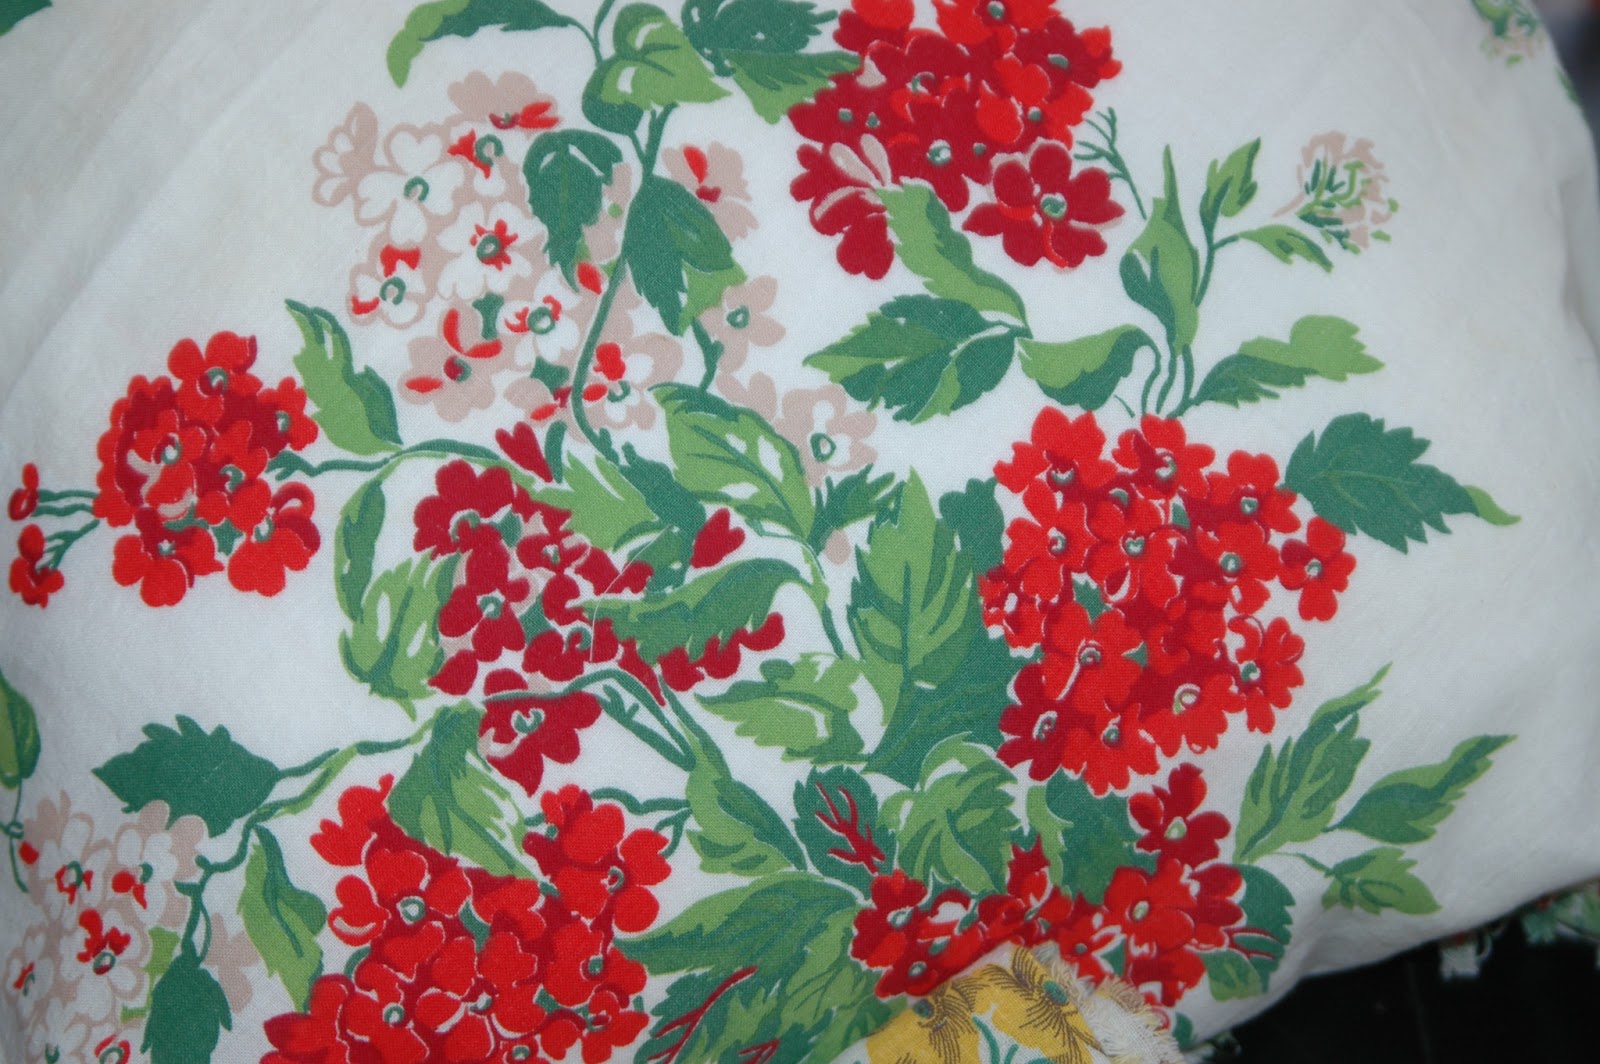
As I write today we are waiting for the Blizzard of 2013 to arrive along the Eastern Sea Coast. If you are in the storms path stay safe! If we don't lose power I plan on doing some sewing this weekend.. I'm making pillows out of vintage table cloths and grain sacks for my booth! I promise pics next week! With high winds and over two feet of snow predicted why not settle in for some garden planning too?

Fruhlingskabine Micro- Farm shared a great post on setting up their own fodder sprouting system  as a way to ween their  farmyard animals off of processed feed and onto a more natural diet. Are you kidding me? I love this idea!


Rob of Beba's Garden shared his plans for cold frames and early seed starting. Like while there is still snow on the ground early...


Have you created a Children's Garden as part of your backyard farm? Gretchen of 
The Backyard Farming Connection wants to know! I fell in love with  the photos of her children's garden.
 Every child needs a garden to get lost in, dream in and grow in...

Now, it's your turn to link up for your weekly dose of farmgirl soul food!
 Here are the rules for the Farmgirl/guy Blog Hop!

1.) Write a post about your farmgirl lifestyle and brag a little about your farmgirl talents while your at it! Share what being a farmgirl means to you. Include lots of photos of your farm, crafts, animals,  quilts, home decor projects and thrifty make overs, your backyard garden, chicken coop, recipes, studio or workshop. You get the idea!
2). Leave your entry in the  Linky tools space to your  Farmgirl Friday post.
3). Please include the Farmgirl Friday button ( or link back here ) in your post and remember to share this hop with all of your blogging friends!
4.) Enter up to three entries per hop! 

 DON'T BE SHY~  
Be sure to leave a note if you're new to the hop! If you haven't clicked that follow button yet, please join us and be sure to stop by our FACEBOOK page and like us there too! 
As always, thank you for your continued participation and welcome new friends and followers!

Don't forget to grab your FEATURED FARMGIRL BUTTON if you've been featured!


Yours, in farmgirl spirit.
Deb, Heidi and Dolly


Wednesday, February 6, 2013

Homemade Coffee Sign Tutorial~ GUEST POST


Dear friends, I'm so excited! Manuela from the fantastic home making blog A Cultivated Nest is here to share her easy and frugal hand painted Coffee Sign Tutorial! Manuela has made a mission out of making do with the home you have now. Her blog is choc a block full of easy, frugal decorating ideas with practical charm and that warm, homey feeling. So sit back and enjoy this wonderful tutorial sure to inspire creative ideas of your own! Take it away Manuela!


Hi, I'm Manuela from A Cultivated Nest where I blog about gardening & making the most of the home you have now. I'm so excited that Deborah Jean asked me to share a project with you all!

  I'm going to show you how I made that hand painted “Coffee” sign. If you've ever priced hand painted signs on Etsy or eBay you know they can be pretty pricey. Well, they are really easy to make! 


  You need a piece of wood that you've painted in the color of your choice - I just used some aqua craft paint that I happened to have. Flat and satin is the best finish to use for this type of project. You are going to print out the words that you want on your sign. So what I do is open Word and start playing with the different fonts and sizes.  For this sign I used the Oldgate Lane Outline font and I changed the size to 200. The word "Coffee" is printed in landscape because otherwise you wouldn't be able to fit the whole word onto a sheet of paper at this size.  I just liked the font  and  had to try several different sizes before I found the one that would work with my piece of wood.


2.To transfer your word(s) onto your sign use either graphite paper which is what I did here or cover the back of your words with artists charcoal, crayon or press really hard so that an indentation is left. I’ve used all these methods and the graphite paper (Micheal's, Hobby Lobby, art stores etc.) has been the easiest to work with.

3. Use a dull pencil or something that’s not too pointy and trace over your printed out letters. You should have your board, graphite paper and printed out words in that order.


 4. Now that your letters are transferred, all you have to do is fill them in! You can use a brush or a paint pen if you think your hand isn’t steady enough for a paint brush. 


I’ve used them both and I find I like the paint pen better - it's easier for me to trace around the letters and then fill in. But if you like using a brush, a firm angled one is easiest to use in this application. 


 After your sign is dry, you can sand it as much or as little as you want to get a distressed vintage look. I sanded the edges and over the words. You can also seal it if you're going to put it in your garden.

Using this basic technique allows you to customize your sign any way you want. Plus these make great gifts or you can keep it for yourself! 

Follow A Cultivated Nest on Pinterest too!
Sharing this post with Tillys' Net Down Home Blog Hop
and The Country Homemaker Hop! 
Related Posts Plugin for WordPress, Blogger...