Showing posts with label Cape Cod Gardening. Show all posts

Monday, June 6, 2016

How to Plant Dahlia Tubers


Howdy friends! Happy June! I've missed you! How has it been nearly a month since my last post? I can assure you it's not for lack of good writing material. I've been getting my gardens and containers prepped for planting while waiting for the weather to warm up enough to plant my dahlia tubers and seeds. We've had a cool, wet spring so I've held off on planting anything outside until last week. I can't tell you how excited I am to have them in the ground finally!

 At first sight a dahlia tuber can be a little intimidating to the new grower.  It can be difficult to distinguish which end is up, or down. Honestly, how can anything this ugly make something so beautiful?


The tuber above is one that I dug up and over wintered from last season. It already had a new eye start on it before I stored it. You can see where the stem was cut off at the very top of the photo. When you plant dahlia tubers, plant them with the stem facing upwards and the tubers hanging below facing downwards in a six inch deep hole. Cover them and water in well but be careful not to soak them. You don't want to risk rotting the tubers before they get going!

Give your dahlias nutrient rich soil with plenty of organic matter mixed in and a minimum of 6 hours of sunlight per day.


I over wintered last seasons tubers in a plastic bin filled with pine shavings. This is how they looked when I uncovered them in April to check for mold or any rotted soft material on the tubers. Always check your tubers during storage to make sure they're not getting too moist. I also trimmed off all the dried scraggly roots from the tubers and then I placed them in fresh shavings until planting time.

Dahlias bloom on tall plants that can reach over 5" tall. They will fall to the ground if not supported correctly.  I like to wait until they get several inches above ground before I stake them. That way I can be sure not to disturb or damage the tubers. Wooden stakes or bamboo garden stakes work well in a small operation where only one or two people tend the flowers. I tie them up with regular old garden twine. Have I mentioned how much I love twine? I L.O.V.E. TWINE!

Dahlias growing tall and proud! 


If you haven't tried dahlias in your garden or backyard flower farm yet I hope you'll give them a try this season. I love using them in my wedding work and I especially enjoy them on my dining room table, or anywhere for that matter!


I'm excited to see how the new Bridal Mix and Antique Anemone varieties I ordered from Eden Brothers do this year!  

Put down some roots and bloom!
Deb


Friday, March 18, 2016

MUM'S the Word ( King's Mums)

King's Mums


One of the greatest gifts of gardening is knowing that there will always be new plants to discover and trial. I just clicked the "order " button over at King's Mums and I can't wait to begin a new romance with these gorgeous old fashioned blooms. These billowy, voluptuous, romantic blooms are finding their way back into home gardens and floral design and for good reason. They are simply sumptuous and bring an old fashioned charm to the garden. Did you know that Chrysanthemum is the flower for the month of November? I'm a November baby and I've been walking around with that fun fact in my brain for years. It's about time I planted some don't you think?

I'm just dipping my toes into the wonderful world of Chrysanthemums and you can be sure I won't be able to keep quiet about them once I see them in action and I'll be sure to share all growing tips as I get a grasp on how they do here in the south coast of New England.
Something tells me that a life time wouldn't be long enough to learn everything there is to know about Chrysanthemums, though.

 Cultivars are grouped by the National Chrysanthemum Society bloom class number. There are 13  numbered classes that are divided into three lettered classes, A, B, and C. The letters that follow each number designate the cultivars size. I chose mostly tall varieties for cutting.
I'm just sharing a snippet today... When the plugs come in I'll share planting tips! In the meantime, I encourage you to check out King's Mums website to learn more about these beauties and pick a few to trial in your garden this year.

Seton's J Dore
Isn't she lovely? Isn't she won-der-ful? I'm hoping ( praying ) she'll find her way into some design work this season. Heck, I'd settle for just seeing her in the garden too.

 Are you digging into the unknown in your garden this year too? If any of you have experience with " mums" please share.

 Put down some roots and BLOOM

Deb

Thursday, July 25, 2013

Feed Them and They Will Bloom


 BIG beautiful BLOOMS don't just happen, jus like healthy, well behaved children don't just happen. Both take constant LOVE,  nurturing and feeding if you expect to get healthy results.  

 It's feeding time for all the annual cut flowers at Dandelion House. The zinnias, dahlias, gladiolus and sunflowers are putting on their first flower faces as a result of all the loving care they've had since being planted in the late spring. If I want more beautiful, BRILLIANT BLOOMS I've got to feed them from here on out, at a minimum, every 2- 3 weeks.


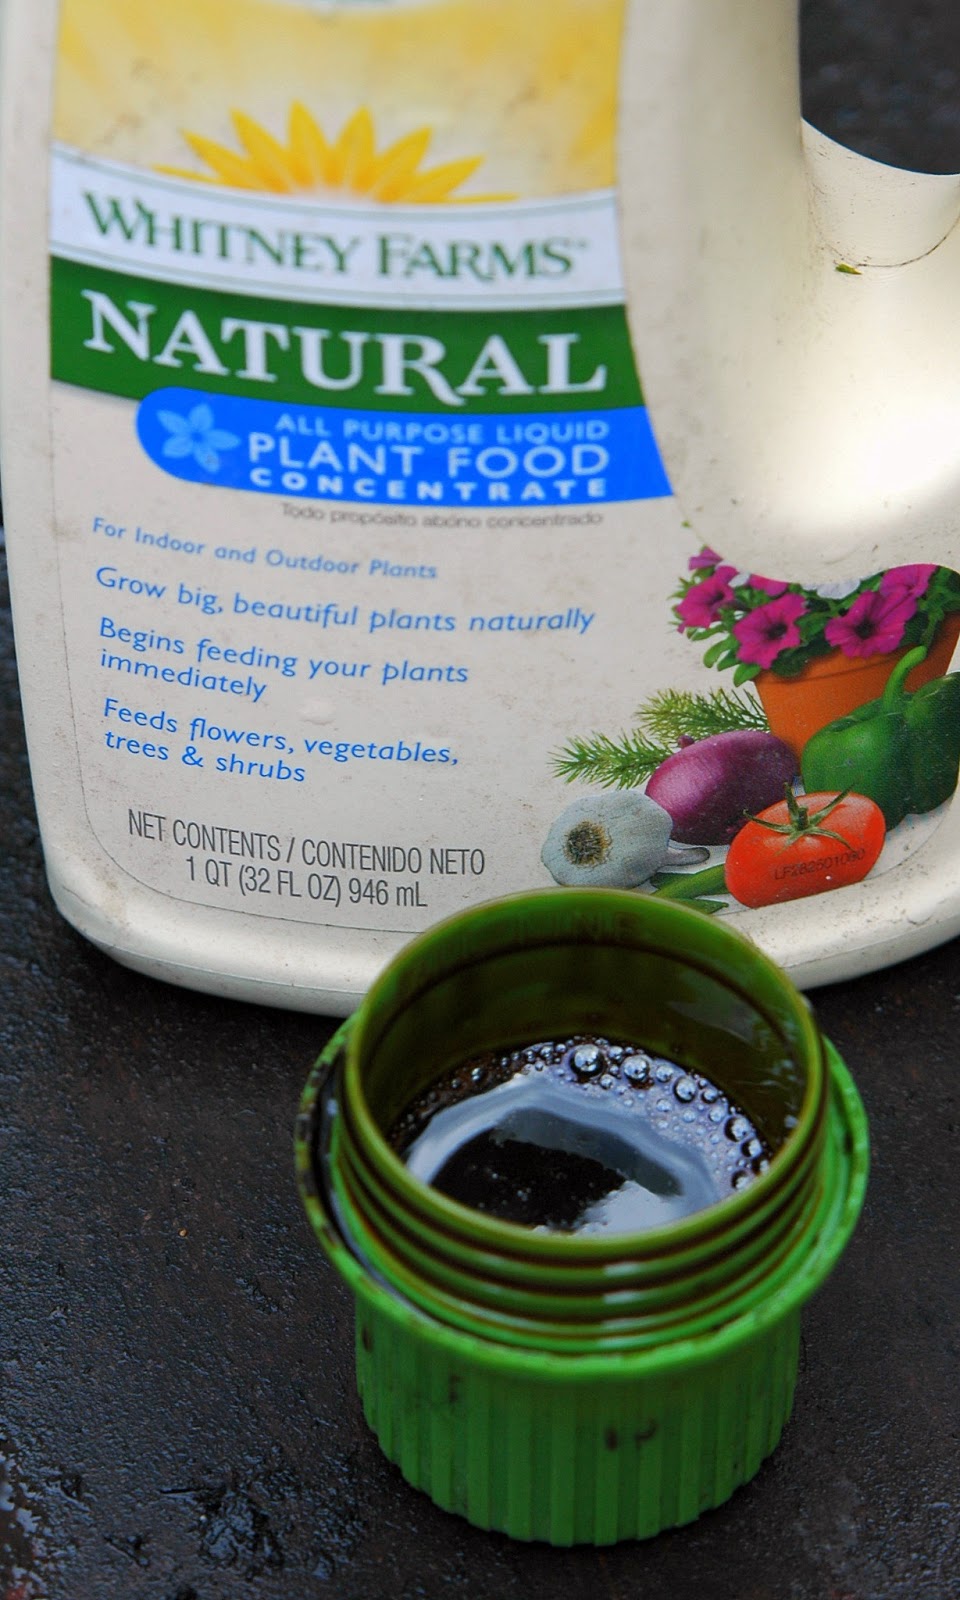
I used Whitney Farms Organic Plant Food Liquid Concentrate last season and was very satisfied with the results. Not a paid plug here, just look at my top photo!
That bucket of blooms is from late August 2012.

GroundWorks Watering Can ( Plastic)
Simply pour one half cup of fertilizer into a 2 gallon watering can and fill it with water then pour around the base of each plant trying to stay off of the leaves if at all possible.


2 gallons will feed about 20 square feet. I prefer this method for smaller garden areas because it gives me the control I want and I know my plants will pay it forward from summer until the first frost. 


First Dahlia Blossom of 2013!

Do you feed your flowers and veggies organically? 
What method do you find most successful for YOUR garden?


Monday, June 17, 2013

Cottage Style DECK GARDEN

Deck garden, green house garden and hen house in the rear.
 It's almost that time of year where we gardeners get to sit back and begin to enjoy the fruits of our labor. Seeds are in, sprouts are shooting out of the ground, ( hopefully) and the old stand-byes are about to being their show for the summer. 
So many people have decks in their backyards today. They fit into just about every architecture style possible and they add usable living space in the spring, summer and fall. But a deck with out a comfortable place to sit, some shade if it's on the south or west side of the house and plants to enjoy close-up can feel anything but inviting.


 Our house had a deck when we bought it and I remember the first time we saw it very clearly. It was the month of June and the cottage style garden that surrounded the entire deck was in full bloom. I was so charmed by the flowers as I walked up the path to the side door, not doubt that was the second I knew this was to be our new home!  I wish I could say I was as enamored with the inside; it was livable and I knew we'd make changes along the way. That was twelve years ago and many changes, updates and adaptations inside and out have occurred but even before the chickens and the greenhouse garden came on the scene, I loved puttering in the Cape Cod Cottage deck garden when the kids were smaller  and I didn't have time to take on larger gardening projects.


The previous owner had planted, geranium, bee balm, day-lilies, creeping phlox, Shasta daisies, and oriental lilies in sort of a miss- mash arrangement. I loved the wild, unkempt way the flowers mingled together and enjoyed it for a several years until some of the perennials started to look tired or not perform as they had in the past. 


 I've gradually been ripping out the the older plants and replacing them with more traditional Cape Cod Cottage style plants. I felt the garden needed a few for fullness and romance so I added some 
Endless Summer Blue Hydrangea,

 
 A David Austin Rose ( not sure of the variety now )

  Knock out Roses, ( low to the ground variety )  and Cat Mint ' walkers low" for a little structure and more color!


The cat mint, and roses are in bloom now, and the hydrangea is just about to bloom! 

This is the South side filled with day lilies, tiger lilies, oriental lilies. daisies, and black eyed Susan's that pop up every where in mid summer providing a sea of happy yellow faces dancing above the top of the deck! All of these flowers and shrubs mix nicely with annual cut flowers for bouquets or all by themselves in a tiny vase next to your kitchen sink. 


 If you've got a deck and nothing growing next to it, consider taking a trip to your local nursery for some inspiration.  All you need is a couple of feet ( three feet in depth is perfect ) all the way around to add some life to your deck!


I don't grow anything more than 5 feet high because I don't want to block my view out to the rest of the garden and I don't grow anything really tiny either... 12 inches to 5 feet is my height range with the taller plants placed at the corners and in the middle on the longer sides for color and fullness. Of course, if you don't have any space at all next to your deck, container gardens are the next best thing!
 Oh, I should mention... veggies and herbs mixed in to your flowers and shrubs is a great way to save space too but you might want to plant your mint in a container.. It spreads and takes over in a hurry! 

What do you grow next to ( or on ) your deck? 


Happy Gardening friends!
 
Related Posts Plugin for WordPress, Blogger...