Saturday, December 12, 2015

Farmgirl Friday Blog Hop # 211

Howdy Farmgirls! 
Welcome back to FGF! With less that two weeks away from Christmas there's still so much to do which can leave even the most creative farmgirl feeling a little cheated in the creative department. 
After all, the holidays just bring out the muse in all of us don't they? 

 Carole West, of Garden Up Green ( she's my woodsperation lady )  doesn't let anything stand in her way when it comes to designing and creating her one of a kind wood projects. Last week she shared a link featuring her Holiday Crate project x10! It's a fine collaboration of 10 crafty blogger's who joined in to create some of the most unique and Christmas-y crate projects I've ever seen. 

Love this Carole! 

Stop by Carole's to say howdy and check out all 10 of the inspiring crate projects from her Holiday Crate Project x 10!

As for this farmgirl, I've been playing in the pine branches and working on some of my own wood crafting projects which I'll share soon!  

Debbie and I wish you all  a festive holiday season and we'll see you next week! 
( Debbie is on holiday this week and sends her farmgirl wishes )

Let's get hoppin! 


Friday, December 4, 2015

Farmgirl Friday Blog Hop # 210


Welcome back to the Farmgirl Friday Blog Hop! Can you believe it's December already. November just flew by and suddenly it's time to get Christmas under way. How are your holiday plans coming together this year?  Debbie and I hope you're taking it easy and not giving in to the pressure of making Christmas perfect. The beauty of this time of year is the opportunity we are given to slow down and work on crafts, cook, decorate and enjoy time with our families. Something all farmgirls are good at!


 I was able to do some crafting earlier this week and I'm excited to share these fun up-cycled canning jar lid Christmas Ornaments I made with you!


If you're looking for a quick and easy Farmgirl-y Christmas craft to do check out my tutorial here

News from my co-hostess Farmgirl Unleashed is that she's in deep in the BIG kitchen remodel ( I can't wait to see it when it's done ) and would you believe she's still got tomatoes ripening in the basement? I hope she shares her FRESH Tomato Quiche recipe with us! ( hint hint, Debbie )

LUCKY GIRL!!!

Thanks so much for joining in this little round up of Farmgirl ingenuity.
 You continue to inspire each and every week! 
            One last note: CONGRATULATIONS to Daisy of  Maple Hill Farm Blogspot!
                                                         You won the note card giveaway!
                                                       Thanks so much for playing along.
Have a great weekend everyone! 


Wednesday, November 25, 2015

Happy GLITZY Thanksgiving


Howdy friends,

 I wanted to stop in and wish you all a very happy ( AND GLITZY ) Thanksgiving.

I attended a very fun floral workshop last evening where I got my farmer/florist fix on with roses, spider mums, seeded eucalyptus, goldenrod, pine-cones and a pretty gilded pumpkin for a vase.
 I'll share more about the workshop in a future post, for now... it's time to get cookin'!

Enjoy your holiday! 
Love, Deb 

Friday, November 20, 2015

Farmgirl Friday Blog Hop # 209 and an Autumn Note Card Giveaway!

My favorite fall captures made into note cards.
 Happy Farmgirl Friday! Thank for joining us again. I bet you're all busy getting ready for the Thanksgiving holiday. We're keeping things traditional here with a mid-day meal of roasted turkey, mashed taters and gravy, stuffing with craisins, green beans, dinner rolls and of course pumpkin pie for dessert. Speaking of delicious fall food. Debbie has an easy peezy Roasted Tomato Sauce recipe for you to try using your homegrown tomatoes or farmers market maters. I can't wait to give it a go this weekend.

 I love this time of year with all the fun fall festivities, turning of the leaves and happy fun fall gatherings. 

Many of us live miles from our loved ones and homesickness can hit home in a hurry this time of year. Face-time and Face book fill the gaps in between but nothings better than a handwritten note to let your loved ones know how much you think of them.

In celebration of this season of gathering and gratefulness I'm giving away a set of my handmade Autumn Note Cards featuring some of my favorite fall captures from Dandelion House.

Double your chance to win!

To enter, simply leave a comment on this blog post and over at Debbie's Farmgirl Unleashed Blog telling us why you love to " keep in touch" the old-fashioned way!
Good luck! We'll announce the winner next week! 

 Now, let's hop!
Happy, happy Thanksgiving!!!


Tuesday, November 10, 2015

Digging Dahlias and Winter Storage

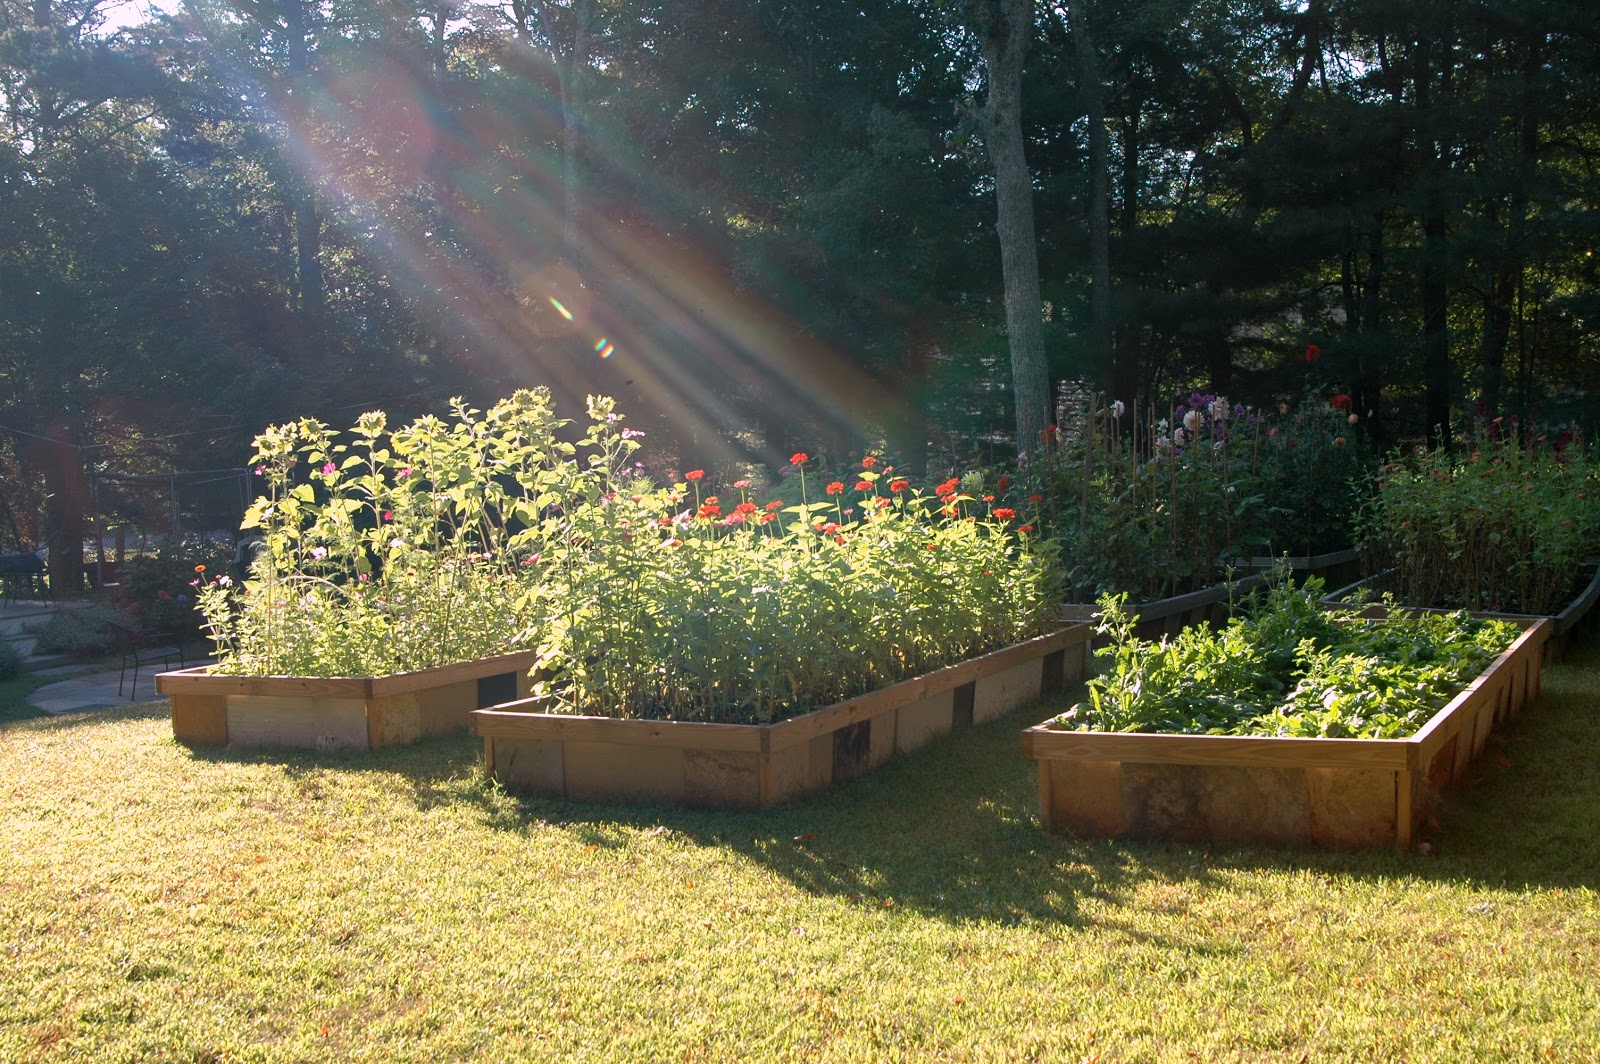
Glorious dahlias in pumpkin vase mixed with hydrangea, sedum and pumpkin on a stick.
 Dear Dahlias,
 How do I love thee? I couldn't possibly count the number of ways I adore you. I am intoxicated by your beauty and I mourn your absence even before the first frost comes to take you from me for another long New England winter. I love you so much that I will dig each and every one of you out of the ground so you don't rot in our bitter 7-7a garden zone. I'll put up with a stiff back and sore knees believing that for all of my efforts to tuck you away safely in storage there's a chance I'll see you again next summer. That's how much I love thee. 

Growing dahlias isn't hard. They are happy in a container or in the ground as long as they have rich, well draining soil, plenty of sunshine and lots of love. The challenging ( and most labor intensive ) part comes when it's time to dig them up at the end of the season. 


 If you garden in a cold climate you will have to dig your dahlias. There's just no way around it.
 After the first frost the leaves will wilt and turn almost black. No need to rush with the digging them just yet. Give them a couple of more weeks in the earth. Even though the flowers and foliage appear to be dead, the tuber is still growing and putting on new eyes (growth ) for next years blooms. 


I cut all of my dahlias down leaving the tops showing above ground before digging them so I'm sure to get every one. To dig I use my handy garden spade and gently poke around about a foot or so away from where the stem is to be sure not to damage the roots.

 Once they are dug, rinse them off lightly and let them dry on a surface that allows airflow like a screened table or greenhouse work bench with drainage. I used our patio table.

After they are dry, shake off any excess dirt and  remove any untidy roots ( as seen below ) and divide if necessary. Some you just pull apart gently and others you will need to cut.  If you do divide, just make sure you have a visible eye on the tuber. If you're not sure, pack it away until spring. You just might get lucky and you can divide then.
 

Now is a good time to label your tubers. You can use copper tags with wire, plastic garden markers with twisty ties, or oak leaf tags with permanent marker tied with twine.You can also write directly on the tuber with an indelible pencil or permanent marking pen.

Mine are stored in correlation with the bed they were planted in. I have a master list of the names of each variety that was planted in each bed to refer to come planting time. That's not the most organized fashion to do it, but at least I'll know generally which ones go together next season. 
This year I am storing about 75 tubers so that's not too many to keep track of and store. I'll be expanding to 100 -150 next season. I'm stocking up on Advil now!

 I decided to store them in Rubbermaid bins layered in pine shavings with the lids off and covered with a double layer of landscaping burlap fabric so there's some ventilation. I have them all tucked in for their long winters nap in our unfinished basement. Dahlias prefer to be stored in cooler temps. 35- 50 degrees. Wish us luck! 
Here are two great videos from Swan Island Dahlias on how to Dig Dahlias and Divide them.
I'd love to hear your dahlia storage tips too. Leave me a note if you've had success storing dahlias!


Monday, November 2, 2015

Field To Vase Supports American Flower Farmers

That's me! On the Field to Vase blog today!
What do you picture when you hear the phrase, " Field to Vase" ? If your vision includes beautiful flowers like the kind your grandmother grew in her garden then you are right on the money. Today's flower farmers grow in hoop-houses, greenhouses, backyards and front-yards, abandoned city lots, community plots, and good old -fashioned farmland too. I'm talking about flower farmers who grow 100% home-grown flowers for wholesale, retail, weddings, events and more. 
If you've been with me for some time now, you know I'm a budding backyard flower farmer aiming to do my small part in bringing flowers back home to American soil where they first began. Imagine how excited I was to find others who are doing the exact same thing all over the United States.


 I'm so excited to introduce you to a fantastic grass root/flower roots online community called Field to Vase. An online directory of flower farmers and farmer/florists committed to educating the public about where to find local flowers where ever you live. I learned about it through digging around online looking for flower farming communities on Facebook. 


This community was created by Christine Stembel, founder of Farmgirl Flowers. She ( and her team of talented artisan floral designers) have earned rock star status in San Francisco, Calif. with their signature burlap wrapped bouquets using flowers 100% locally sourced flowers from local flower farms in California.
 Farmgirl Flowers was also recently featured in a three page spread in the San Francisco Chronicle.
How cool is that?
Check them out on Yelp to see more fabulous flower photos and read over 600 reviews!
And, if you're thinking about starting your own backyard flower farm some day, read my article on the Field to Vase Blog, and meet more inspiring flower farmers there too. Who knows? You could be living right next door to your local flower farmer.


Friday, October 30, 2015

Farmgirl Friday Blog Hop #208 and Happy Halloween!

Happy Farmgirl Friday! 

Oh, it did our hearts good to see you all last week! Thanks for comin' round to share your farmgirl talents with us again.  I confess I don't have any cute Halloween crafts or treats to share this week. We had company from Reno, Nevada last week so we were out and about sight seeing all up an down the south coast and Cape Cod enjoying fall in New England. Everywhere you go, people are saying the color hasn't been this beautiful in years and I agree.


  I had to pull over and get a quick pic of this charming little red cape all gussied up for fall. We're also in the middle of a bathroom remodel and putting the garden to bed. I've got dahlias to dig and store and a fallen down greenhouse to clear out before winter comes. Life is GOOD!


Debbie's been busy canning of all things, right in the middle of her kitchen remodel. Now, that's some serious farmgirl'n! As the old saying goes, " where there's a determined farmgirl, it shall be done ". Okay, maybe it's not an old saying, but it's true!

 Speaking of determined and talented farmgirls, it's time to renew my subscription to MaryJanesFarm Magazine. Yes, this IS a shameless plug for my favorite magazine in the whole world. It just gets better with every issue... and that's a lot of issues. 15 years and counting of farmgirl inspiration! 


I couldn't pick a favorite from last weeks hop. I loved each and every entry. So many hit home and inspired me to get moving. I need to make marinara sauce, I cleaned my closet yesterday, ( not photo worthy, but clean), I'm still decorating for fall, and I'm always looking for new homesteading and decorating ideas. Thanks for covering all the bases, once again! 

Let's hop farmgirls! 

Now, where did I put my witches hat?

Tuesday, October 27, 2015

Garden Notes: Amazing Autumn Asters


 Are these the cutest, frilliest little fall flowers you've ever seen? I'm in love with these adorable Asters from Baker Creek Heirloom Seeds.

I planted a few packets of these in a trial bed as a late crop to see how I would like them.
Talk about beautiful and hardy. They survived the first frost and are still going strong in the garden when everything else is done for the season.


See  how luscious they still look!


The variety of colors and petal shapes in one mix of seed packets is brilliant! 
This mix includes single petals, flat petals and curly ribbon-like petals. The multi petal flowers look almost like a Chrysanthemum. My daughter said they reminded her of those big curly ribbon bows you find at the supermarket in the gift wrap section.

It begins with pure white,

  followed by lilac, then  light pink, dark pink and deep purple.


These little cuties are very easy to grow and Baker Creek Heirloom seeds has a near perfect germination rate. Plant them after danger of the last frost all the way until early July and you'll have blooms into late October. They take a while to put on buds but once they do, watch out!


The mix well with the bolder colors of late summer/fall bloomers such as,dahlias, zinnias, pincushion flowers and sunflowers. 

If you've got some extra room in your cutting garden or an extra row or two on your flower farm, I highly recommend them. If some of the other varieties are this easy to grow I'm up for more amazing Asters next season.


Friday, October 23, 2015

Farmgirl Friday Blog Hop # 207


Howdy friends! Welcome back to the Farmgirl Friday Blog Hop!
Your place to share your best recipes, crafts, DIY projects, farm stories, farm animal tips, and vintage treasures and what ever else you fancy. 

I hope you are all settling in to fall. It's such a wonderful time of year for getting out and enjoying milder weather, beautiful scenery and delicious food that celebrates harvest season.

Where have we been the last month? I apologize for going missing. This farmgirl had her hands busy with all things flowers this year and somehow our little ole hop ended up at the bottom of the pile. It was a season of growth inside and out!
Apple Stuffed Acorn Squash with Craisins
It's about to get cold and dark out and we're gonna need each-other over the long winter months ahead. To spice things up in our kitchen, I promised myself I would make more " new recipes" rather than fall-back on my old stand-by meals. This week I made a delicious Apple Stuffed Acorn Squash with Craisins and boy was it yummy! I found the recipe online in MaryJanesFarm Recipe of the 
Week. You can read all about it in my Beach Farmgirl post here.

 What have you been cooking up now that the weather has a chill in it? Do tell!


My farmgirl co-hostess, Debbie and I have missed our hop so let's get to it!


Monday, October 19, 2015

DIY Wedding Flowers for Rouwenna and Craig

Rouwenna and Craig
Every time I look at this photo I just get giddy! What a joy it was to provide flowers for Rouwenna and Craig's DIY wedding. I had the pleasure of meeting the bride when she visited the farm to discuss her wedding and flowers with me. I love having people out to see where their flowers are tended and loved prior to the wedding day.

Rouwenna  (such a pretty name) was kind enough to send me some photos of the flowers in action to share with you so here goes!
Dandelion House Flowers
 Rouwenna and Craig put together such a beautiful and personal celebration for their late September wedding day starting with the venue. Not far from Plymouth center is Pinewood Lodge Campground and Events Center, ( a family owned and operated campground  tucked into the woods overlooking a scenic pond with a lodge, outdoor events center, tent and trailer sites, cabins, cottages and yurts for rent).  Family from both sides of the isle came from far and wide to " camp out " at the Pinewood Lodge for a few days prior to the wedding.  

I loved this brides can-do spirit. She took a personal and practical approach with every detail. She knew exactly  what she wanted and stuck to her budget. I admire that! One of the things she wanted was tiny purple flowers and some baby's breath for her hair. Luckily my perennial asters were in  bloom the week of her wedding and the lilac color matched her flower-girls dresses to a tee!


Family and friends gathered the night before the wedding for the rehearsal dinner and some DIY flower arranging for the following day!

The bride getting some help with her bouquet.
 
She went with the ever popular mason jar for vases with fit the bill for her rustic venue. The colors of the flowers popped against the backdrop of the bridesmaids navy blue dresses. 

The bride and groom with the ladies of the wedding party.


 Mr. and Mrs. 


What I learned:
  •  On the "farm" side of things the dahlia patch suffered a spider-mite epidemic in mid-August that nearly wiped out one entire raised bed. I just barely made it for being able to provide enough flowers for what the bride ordered. I had to source additional flowers from a nearby local flower farmer. She was in the same boat as I was, scurrying to finish her wedding season also but the added blooms helped! I'll be planting 6, 4x12 beds of dahlias instead of three next year.
  • Listen, listen, listen...to your bride! Don't push unnecessary flowers and drive up costs. DIY brides are DIY brides for a reason. They are on limited budgets but also very creative and are keen on putting a personal touch on their wedding. I respect that being a DIY'r too.  
  • Provide some flower arranging tips for your DIY brides. Print out a small list of how to care for the flowers, and some flower arranging tips.
  • Be confident you can deliver what you promised. The day Rouwenna visited my flower farm I had just done a big cutting for a previous wedding. My established beds were a bit bare and my second crop was just starting to form buds. If I was her, I might not have committed but she believed, because I believed.
  • Be flexible and enjoy the little surprises and surpluses along the way. It's all good when you are surrounded by beautiful flowers every day.
 Oddly enough, I didn't seek out wedding work this summer. Local couples searching for local flowers found me through the farmers market and an add I placed in a local Edible South Shore magazine. I was pleasantly surprised by the interest and decided to go for it. I'm not gonna lie, I was nervous about the flowers being " on time " but I welcomed the challenge and new experience. Turns out, I loved it and I can't wait for next year!

So, if you're wondering if you can turn your backyard garden hobby into a small business the answer is absolutely, positively YES! 

Monday, September 28, 2015

Garden Notes: September Snips and Second Flourishes

Mini blooms designed by my girl ( Nicolette)
Hello Blog. Hello Friends. I've missed you! I don't think I've ever gone 20 days without posting. EVER! I think it's high time we get reacquainted, don't you? I confess, I've been posting on Instagram quite a bit and keeping up with my freelance writing work but my Dandelion House writings have been piling up along with the garden waste. Where to begin?

  
What an amazing season we had. In a span of about ten weeks our little backyard flower farm put out enough flowers for three local weddings, two farmers markets, and plenty of household blooms to enjoy. Adding 5 additional raised beds to our existing 8 made all the difference. Planting seeds at intervals of every two weeks in the new beds allowed us to have more flowers longer. I'll plan things even more efficiently next season.

Cosmos
We had very little rain this season which caused the larger perennial beds to crisp up earlier than normal. Even so, the grass plumes are feathered out and look so pretty in the autumn breeze.

Zinnias and Grass
The dahlias suffered from spider mites which stunted the growth for a few weeks in August. Talk about nerve racking! It was right in the middle of wedding season when I needed them to perform the most. I had to perform an emergency spider-ectomy with Neem spray. Complete removal of several plants was also necessary. I got to them a little too late and they just couldn't be saved.

Second Flourish
They finally perked up with new foliage and fresh blossoms just in time for the last two weddings of the season. My last two brides were DIY brides. I'm still waiting on photos. I can't wait to see what they created with their flowers.

I got to experiment with making flower crowns too! I made one out of silk flowers for one bride so it would be a keepsake for her. I'm anxious to make some with fresh flowers too. I have some lovely mixed pin cushion flowers and purple asters about to bloom which will be fun to create with. I didn't know how I would feel doing wedding work but it turns out I LOVE it. Collaborating with couples   about flowers for their big day is exciting and makes me feel all warm and fuzzy inside.

" Having couples out to the farm to see where their flowers will come from and the looks of awe and surprise on their faces when they saw the flowers was validating and inspiring. "

A mix of cultivated and foraged flowers,herbs and berries.
 Of course I made bouquets while we were at the cottage too! I didn't plant anything there this year but I scavenged some volunteer cosmos, mint, goldenrod, quince berries, grape leaves and weed with pretty small white flowers  I don't know the name of.
Cosmos

My daughter scavenged the garden yesterday and came up with this pretty little late September number.

All in all its been such a satisfying and rewarding season on the farm!
 What I've loved the most is doing my part to raise awareness about the slow flower movement and bringing fresh local sustainably grown flowers back home to American soil and America's tables. 


Related Posts Plugin for WordPress, Blogger...